¶ Integration Note
| Manufacturer | Honeywell |
| Model | T5 Smart, T6 Pro Smart, T9, T10 Pro, The Round – All thermostats must be WIFI enabled and supported by the Honeywell Resideo app. Color TSTAT not supported. |
| Driver Name | Honeywell Home |
| Driver Version | 25.10.29.00 |
| Document / Driver Revision | Oct 29, 2025 |
| Core Min / Max Tested | 8.8.xx |
¶ Overview
This is a two-way driver to control and get feedback from the Honeywell Home (Resideo) Wi-Fi enabled thermostats.
The Elan controller is capable of controlling, querying and providing feedback for multiple Honeywell Home units.
¶ Supported Features
THE FOLLOWING OPTIONS ARE SUPPORTED :
- Auto discovery of all thermostats
- Auto installation of all thermostats
- Dynamic mode detection and installation
- Two-way control and feedback of setpoints and fan modes
- Driver supports multiple units
¶ Device Configuration
- The Driver uses the Honeywell Home Cloud. An active internet connection must be present at all times.
- Install each thermostat and connect it to the cloud account and make sure it operates the Heating and Cooling unit directly from the app.
- If Elan is going to automatically manage the device, it is recommended to disable all automatic settings in the app as it will conflict with the configuration in Elan.
- If automatic settings are kept, the Elan controller will update the state. However, updates can take up to the polling time seconds to sync.
- Make sure the Honeywell Home is fully functional and is online before installing the driver.
- Install all sensors before adding the thermostat to Elan
NOTE: This driver does not support WiFi models that use the Honeywell Total Connect App. The driver only supports devices using the Honeywell Home App or Resideo App
¶ The Following TSTAT’s are known not to work:
WIFI COLOR TOUCHSCREEN THERMOSTAT (RTH9585)
¶ Account Configuration
You must create a developer account for each home / controller. We recommend that you use the same credentials as the Honeywell Home Mobile App.
- Go To https://developer.honeywellhome.com/user/register
- Fill in the information and sign up for the account.
- Sign into your account.

- Go to My Apps, then click Create an App

- Add a name for the App.
- Make sure the name is short and under 10 characters
- Do NOT use any special characters. Only numbers and letters. No underscores, or dashes or any punctuation marks are allowed. The system will accept them, however on the backend they do not work.
- Add the callback URL. Make sure it is exactly this. Copy and Paste is recommended
- https://auth.corebrandsdev.net/oauth.htm

- Click Save Changes. You will see that the app is approved right away. If the app is not approved, contact our technical support.

- Click on the Name of the new App, Leave this page open and copy and paste the Consumer Key and the Consumer Secret into the driver configuration page highlighted on the next page.

¶ Driver Configuration
¶ Installation Process
IMPORTANT NOTE:
It is recommended that you follow the below installation process in order to ensure you are running the latest version of the [driver].
- Unzip and Extract all EDRVC Files from downloaded file into the Driver Installation folder.
- Open Climate, Communication Devices, Add New Communication Device
- Navigate to the folder where the driver is located and Choose the Honeywell Home Driver
NOTE: If the driver doesn’t appear under the Communication Type then make sure that the Honeywell Home driver is extracted to the same folder where all the other drivers are installed from. It’s good practice to create one folder on the computer where all the third party EDRVC files live.
NOTE: If the driver still does not appear, do the following:
- Extract the downloaded zip file to you EDRVC folder (the folder where all custom EDRVC drivers live)
- Go to Thermostat, then add a Honeywell Home driver. Then Delete it.
- Now go back to Communications device, Add, Check the box the says show unsupported devices, the Driver should show up on the bottom.
- You’ll receive a warning that this is not a Native Elan driver, click OK
- The Driver will automatically go into trial mode for 7 days. Wait for about 10 seconds and the Status will turn Green.
- Enter the Driver activation key from Innovo and the Consumer Key / Consumer Secret from the app you created on the Honeywell developer website. Click Apply.
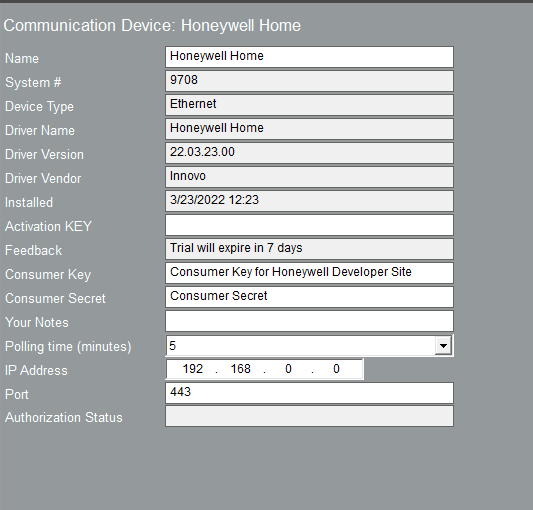
- Click Authorize

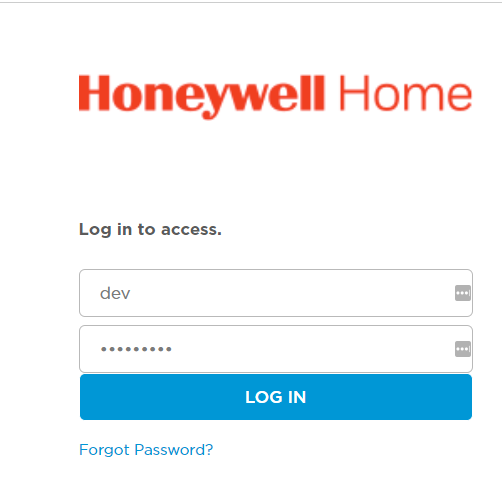
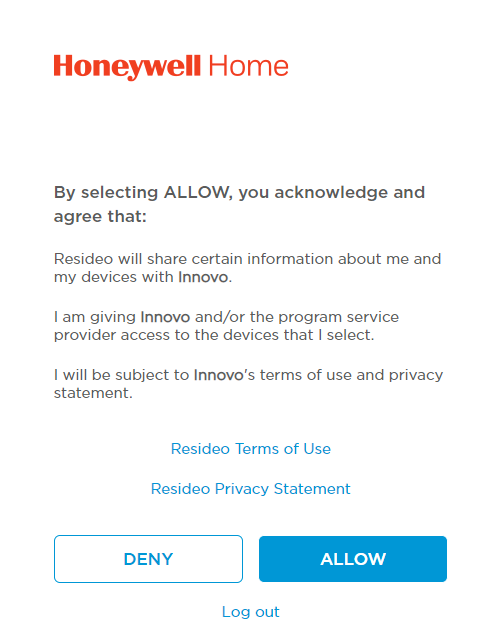
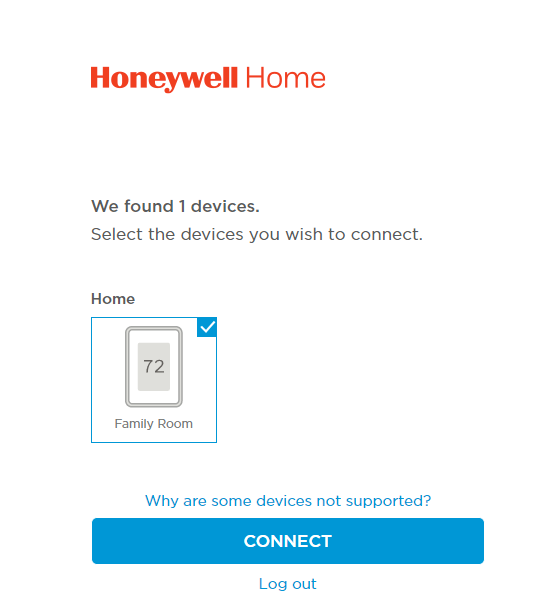
- You will be Taken to the Honeywell Authorization page where you will use your very particular set of skills that you have acquired over a very long career to add your App user credentials, then Allow and connect the necessary thermostats
- Once the authorization id done, close the Elan confirmation page and go back to the configurator.
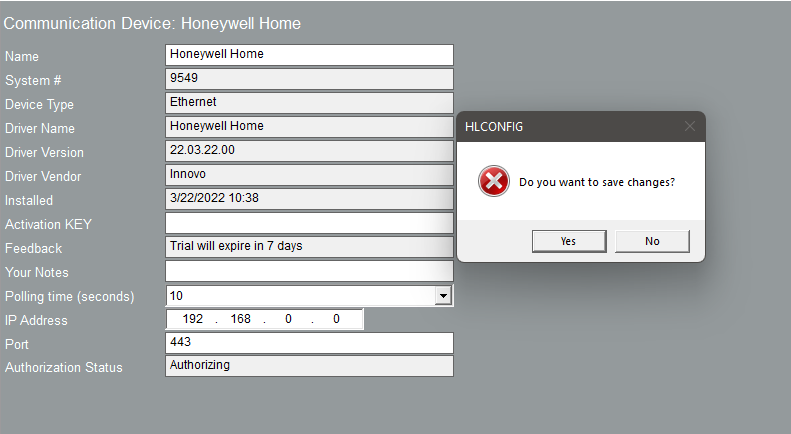
- Click Yes on save changes, then Click Get Devices

- The driver will then Automatically Install
- All the thermostat units attached to the Honeywell Home account
- A default Heating/Cooling Unit.
- Supported operating and fan modes for the system
¶ Using the Driver
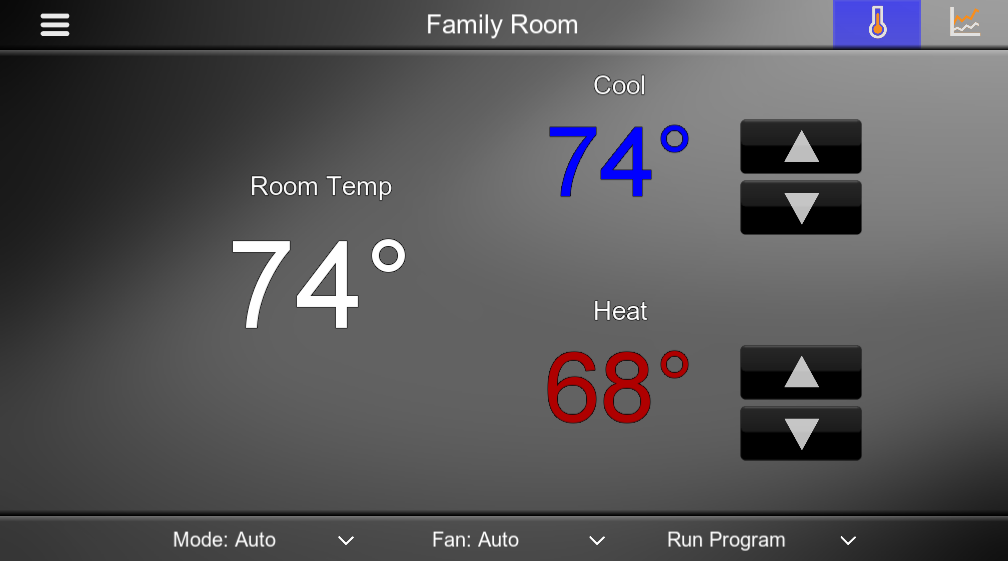
The driver uses the Native Elan Climate Interface. Turn the system on / off and schedule from the interface.
Notes: The system uses the cloud to communicate so there will be a notable delay from when a button is pushed to when the action is taken to the feedback sent back to Elan
¶ Troubleshooting
- On rare occasions, there might be a delay of up to 5 seconds from when the command is issued in Elan to the Honeywell Home unit responding. This is to accommodate multiple up / down pushes. This is not a delay from the driver.
- You receive the message “Too Many Requests”. This means that the Honeywell cloud has timed out. The driver will automatically sleep for 5 minutes and try again. Increase the polling time to 10 or 15 minutes if this keeps happening.
¶ RARE ISSUES
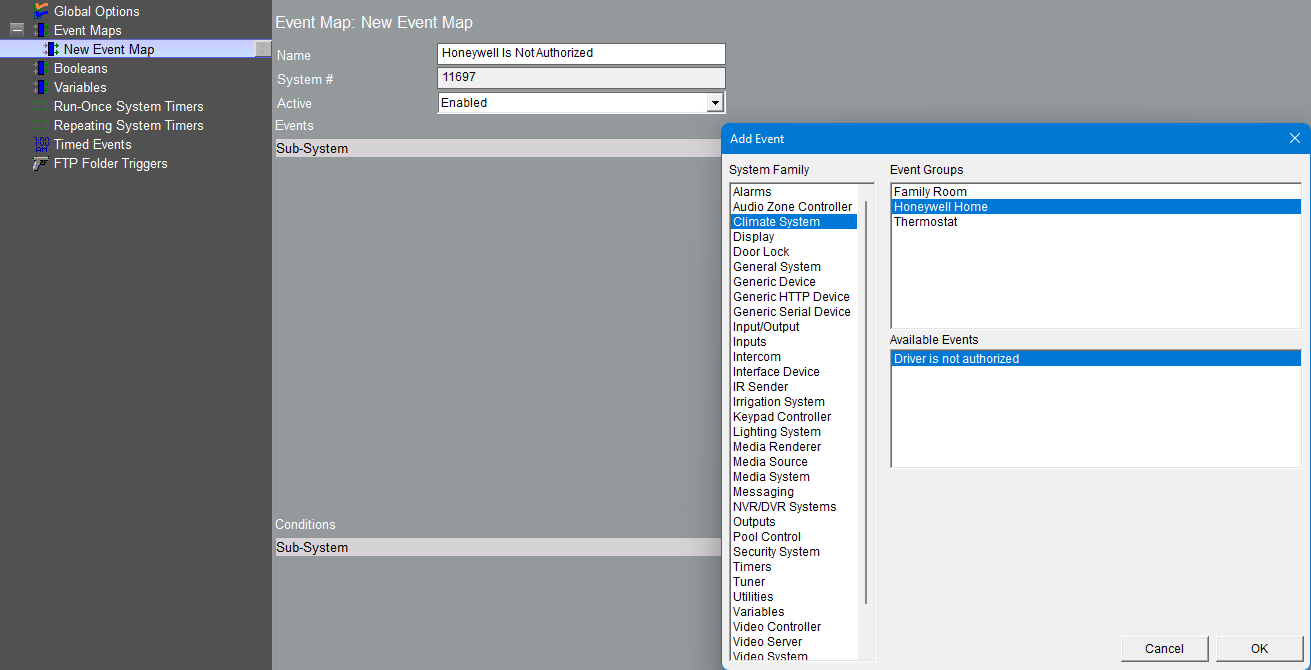
On rare occasions, the Honeywell Thermostat might lose authorization and will have to be reauthorized again using Steps 7 – 9 Above. The driver can not auto-authorize and the authorization has to be done in the Configurator. However, an event map is available to let you know that such actions are needed.
To use the Event Map
Go to Event Mapper —>Create New Event Map —> Add Event—>Climate—>Honeywell is not Authorized, and create a notification trigger.
¶ Changelog
¶ Version 25.10.28.00
- Fixed bugs and improved stability.
¶ Version 25.08.01.00
- Added Show Equipment State Feature.