¶ Integration Note
|
Manufacturer |
Roku |
|
Model |
Roku Streamer, Bar and TV - All |
|
Driver Name |
RokuPro |
|
Driver Version |
25.01.16.00 |
|
Document / Driver Revision |
Jan 16, 2025 |
| Nice OS Support | 8.8.xx |
¶ Important Note
Roku has recently pushed an automatic update firmware that reset the network permissions. If you loose control from Nice / Elan, use the Roku physical remote to make the following changes:
With the Roku remote, select Settings.
Select System.
Navigate to the Advanced System Settings.
Choose Control by Mobile Apps.
Click Network Access.
After the firmware update, the network access setting defaults to "Limited." To restore functionality, change this setting to "Enabled" and accept the security prompt. (This used to be set to permissive now should be Enabled)
¶ Overview
This is a two-in-one driver. The driver will automatically discover all Roku devices on the network and recognize whether they are Roku Streamers, Roku TV Displays or sound bar including the Stream Bar. It will then install each one accordingly under Zone Controllers, Display Drivers or Media Sources in Elan.
This is a two-way driver to control Roku Streamers and Roku TV’s from Elan with dynamic loading of Roku Channels and Favorites, TV Display, TV Source Control, Zone Controller and Volume Control. Now with HR10 / HR30 / HR40 Support.
The Elan controller is capable of querying Roku, returning Channels with Icons, and transport control over Roku.
Note about Elan OS 8.8 / 8.7
The driver has two versions. Each is located under its OS version folder with the same name. The same name makes it easier to upgrade from 8.7 to 8.8 without reinstallation.
Install from the folder matching the Elan OS on the controller.
If you install under 8.7 and upgrade to 8.8, update the driver as well so it will have the supported features.
¶ Supported Features
This is the Pro Version with the following super enhanced feature
- Auto Discovery of Multiple Roku Streamers, Soundbars, Streambars, and TV’s
- Better Search using the keyboard
- HR10 / HR30 / HR40 Support
- Currently Playing Metadata Feedback
- Auto Installation of Multiple Media Source Drivers, Audio Zone Controllers, and Video Display Drivers
- Easy Activation
- Global Search feature (The user no longer has to be in the search page on the Roku Home Screen, Search can happen from any screen)
- Elan Integrated Driver State
- Instant Replay
- End User configured Favorite Channels (The customer can add / change their own favorite channels. No Dealer Configurator needed)
- Enhanced Driver / Installation status
- Faster Transport
- On Screen Keyboard
- Quiet Mode (when driver is not in use it will not query devices)
- Viewer Keyboard for faster entry of username / passwords.
- Channel Icons on / off option for faster Viewer Loading
- Better layout for small screens
- Push and Hold for up/down/left/right/FWD/Rewind keys
- Source switching including the Built-In Roku player, Tuner, HDMI, and AV sources.
- Zone Volume Control
- Power On / Off including Wake-On-LAN of Roku TV’s
- Single Page Layout
¶ Supported Devices
Roku 2, 3, 4, Express, Express +, Stick, Stick+, Ultra, RokuTV, Roku Streambar, Roku Soundbar
¶ Device Configuration
The Driver uses a static IP address for the Roku Player. Although Roku does not allow for Static IP Addresses. Please assign an IP address using DHCP Static Reservation from the router to guarantee that the Roku Device will always have the same IP Address.
Important Note:
Please make sure the Roku Device is configured on the network, registered with Roku, given a name, and has a minimum of 4 Apps installed.
Verify the following settings on your Roku Streamers, Sound bars and TV’s before discover:
Settings —> System —> Advanced System Settings —> Control by mobile Apps →Network Access —> Enabled (Used to be Permissive, but now needs to be Enabled)
Verify the following settings on your Roku TV before discover and during operation
Settings —> System —> Power —> Fast TV Start 🡪 ‘Enable Fast TV Start’ (Checked)
¶ Driver Configuration
The Elan Controller must be on the same subnet as the server and player.
Important Note: Always Backup the controller before installing any new Device Drivers.
Each Roku TV is setup for 7 Sources, 1 – Built-In Roku, 2 – Built-In Tuner, 3,4,5,6 – HDMI (1- 4), 7 – AV1 Input. Not all TV’s will have 4 HDMI’s or an AV input.
¶ Installation Process
The Driver has two Drivers files. Install the driver matching the controller OS from the appropriate folder
Please follow the below installation process in order to ensure proper operation
- Unzip the driver downloaded into the driver installation library.
- Open Media, Communication Devices, Add New Communication Device and check the box that says Show Unsupported Devices. Scroll to the bottom, Choose Roku_Pro (the picture below might show a different version number than the driver actually installed.)
- 8.8 Install 🡪Media🡪Communication Devices🡪Import🡪Driver Folder
Note: If the driver doesn’t appear under the Communication Type then make sure that the Roku_Pro driver is extracted to the same folder where all the other drivers are installed from. It’s good practice to create one folder on the computer where all the third party EDRVC files live.
Note: If the driver still does not appear, do the following:
- Extract the downloaded zip file to you EDRVC folder (the folder where all custom edrvc drivers live)
- Go to Media Source, then add a Roku driver. Then Delete it.
- Now go back to Communications device, Add, Check the box the says show unsupported devices, the Driver should show up on the bottom.
- Once the Driver is installed it will automatically go into a 30-days trial mode after 10 seconds.
- Enter the Activation code received in the confirmation email. Activation codes are also kept in the online account. Tap Apply.
- Wait about 10 seconds and tap Discover
A count of the devices discovered will be displayed in the Feedback window
After another 10 seconds, a notification will appear in the Feedback window that Discovery is finished.
Important Note: If the Roku count does not match the count displayed, tap on Discover again until all Roku’s are discovered.
- At this point, the dealer has an option to enter favorite apps in the Dealer Favorite Apps field. These Favorite apps will be added to each Roku discovered. The App numbers can be changed individually for each media source driver after the installation. The User defined Apps will override these values.
- To Get a list of all the Apps installed on the Roku Player go to http://RokuIPAddress:8060/query/apps
- Enter up to 4 app ids separated by commas, no spaces ( E.g. 12,13,199,45) and no other characters.
- Tap Install and all Roku’s Streamers discovered will be installed under Media Sources and activated with the Activation key. All the Roku TV’s discovered will be installed under Video Displays. All Roku stream and sound bars will be installed under zone controllers.
- The driver will pick up the “Friendly Name” of the Roku device. This is the name of the device that is assigned when the Roku is first configured.
- This name can be changed in the online Roku Account.
- Make sure all the Roku devices are named appropriately before discovery.
- If the name of the device changes, manually edit this field. It is not recommended to re-discover.
- Rename the devices as desired. If the IP address of the Roku Device changes, edit it manually in the IP Address field. With this version, you can discover and install it again without affecting the settings of each device.
- The Favorite Apps is a non-editable field. Please see Setting Favorites below.
- The Channel Icons Feature will turn off / on the channel Icons on the Viewer Menu. This is to address slow loading of some Channel Icons.
¶ User Interface
Intelligent Naming is a new feature that will automatically detect if an icon image is available and when activated it will suppress the name of the Channel. If no icon is found, the channel name will be displayer.
Turn this option on in the configurator.
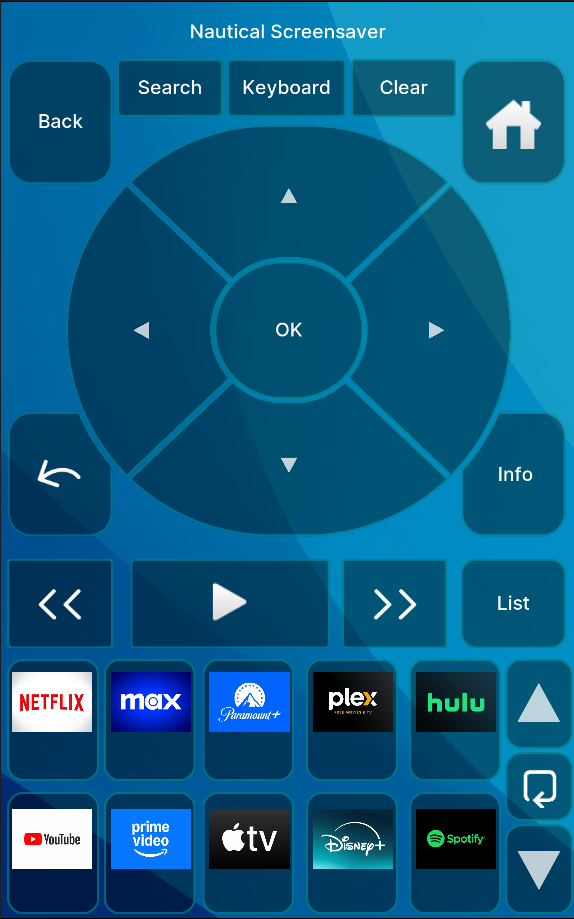
Starting with 8.8, the Roku Pro has two user interfaces installed for each device. The User Interface will have the name roku and and the name of the roku with a “ - 6”. For Example, Living Room and Living Room - 6. The difference between the two is the Roku has a 10 Channel Scroll / Favorite interface and the Roku - 6 has only six. The Roku - 6 has easier readability on the HR40 Remote.
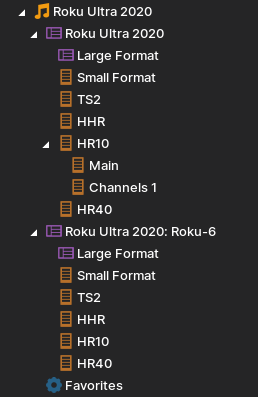
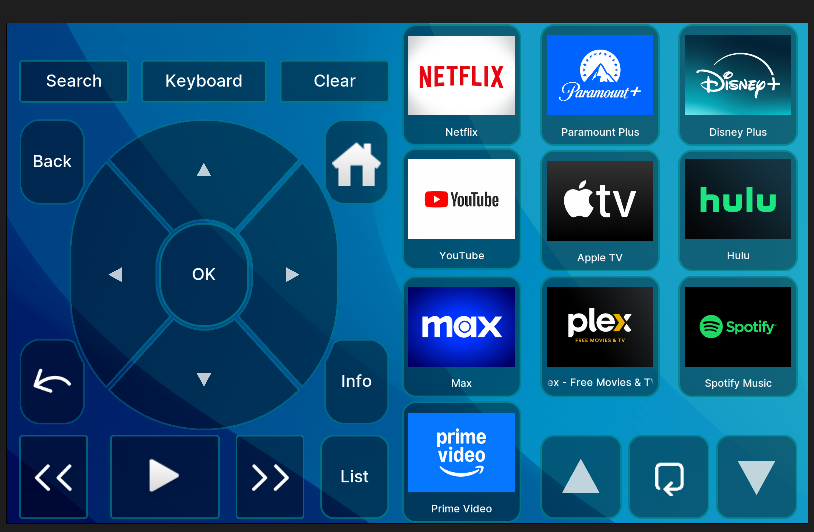
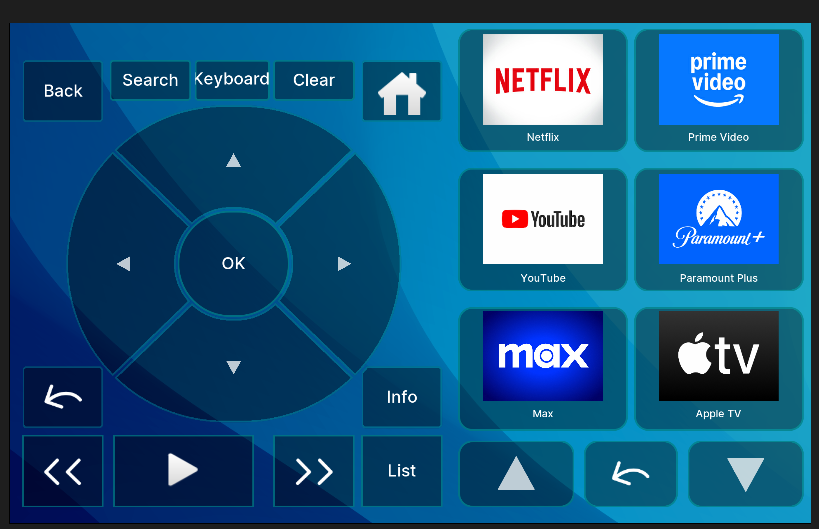
When connecting the Sources, make sure to choose the desired interface.
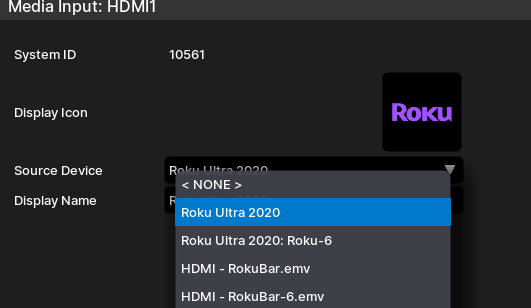
Important Note: If the customer is experiencing slow button loading or a “hanging” effect, turn this option to Off. This will not show the icons on the Viewer and the loading will be faster
- If the Driver finds Roku TV sets, it will install them under the Display Devices.
- It will also automatically install controls and an EMV file for the built in Roku and built in Tuner.
- Configure the Display Driver as desired.
- The Dealer Favorite Apps, Activation and UUID are copied from the Communication Devices Settings
- The Wake On LAN MAC and the IP addresses are automatically populated on discovery
- Each Roku TV is configured for up to 4 HDMI Inputs
- See Step 17 below Regarding PowerOn / PowerOff operations.
- Under Zone Controllers Rename the display and set the Display to the Renamed device.
- To Enable Volume Control on the TV, Set the Volume control to the Roku Display
- The Recommended Default Turn On Source is the Built-In Roku unless the installation calls for a different source.
- Under the Zone Controller, the recommended Setting for On Off Control is Discrete Verify (Always Send)
- PowerOn / PowerOff.
- If the Show as Zone setting is set to Yes, then Power On and Power Off must be manually linked to the proper function.
- Under the Zone in the Zone Controllers, Choose Power On or Off, Add Command, Display, Name of Roku TV, Turn Display On / Off
- Add any extra sources to Display Zones or Zone Controller. Change the name Icons to desired values. There is are icons included with the driver for Display Icons.
¶ Setting Favorites:
Important Note: Users cannot set favorites for the Display Devices. This is an Elan limitation. Those are set by dealer in the Configurator only. Users can set favorites for Media Sources.
- Open the Driver in the Viewer. If Dealer or User favorites are set, they will be displayed in the first column. If not the standard Roku Apps will be displayed. The user can override the Favorite by setting them in the Viewer.
- To Set favorites. Go the Elan Viewer Home and tap the settings sprocket wheel. Enter the code (default is 1234). (Also See Step 6 above)
- Tap Device Settings and choose the device to configure.
- Tap Reload Channels to make sure all channels have been loaded into the memory
- Tap on Set and enter the name of the Favorite Roku Channel to add to the Main Tab
- Important Notes on Setting Favorites:
- Please type the name of the channel exactly as it appears in the Roku Channel Tab.
- There is no feedback if the name is not found or an error occurred.
- Wait about 5 seconds between each entry.
- If the entry is wrong or an error occurred, then the icon won’t show up in the viewer Main Tab. Come back to this screen and try again
Example: YouTube (no spaces between the words). Prime Video (for Amazon Prime).
- When done return to the Main Tab and the favorites should populate. If one doesn’t populate check to make sure that the Channel is installed on Roku and the spelling is correct. For reference, go the Channels Tab and use the names on the bottom of the Icons.
Really Cool Feature: show the end user how to do this so that they can set and change their favorites without using the configurator.
NOTE: These values will override the dealer favorite apps settings. If less than 4 are entered by the user, then the remainder of the apps will be populated from the dealer entry
Example: If a user enters 3 apps and the dealer enters 3. The first 3 from the user will be displayed then the first non-duplicate dealer added value will be displayed
¶ Using the Driver
The Main screen is the transport screen along with 4 dedicated Roku Favorites and the rest for the installed Apps.
The Main Screen will load all the Roku Channels automatically. Launch any Channel on the Roku by tapping the icon or manually using the hat control to scroll through the Channels up or down and tapping OK to launch the channel.
Instant Replay Star (*) Button Hold and Push to List secondary menus
If another Channel is added to the Roku, please tap the reload Arrow key to reload the Channels or start navigating from the start.
The user can run a search from any screen. Just tap on the Search button and enter the search string. The Roku will automatically switch to the Search Screen and return the results.
Special Note about Search Function: The search Button on search enabled Roku remotes will activate the voice activation feature and that can only be used from the physical remote.
Keyboard Button.
The Keyboard button brings up the device’s (iOS, Android, or PC) keyboard. Type the desired string and press enter.
The user must be in a highlighted text field on the Roku Channel such as a username or password field.
Known issues with the keyboard. Every Channel implements their keyboard key entry slightly different. For Example: Disney+ will allow the sending of upper case and lower case. However, it doesn’t respond to push and hold Clear. Vudu will allow the push and hold to Clear, however it will only send UPPER or lower case depending on the screen menu. In cases where the Keyboard entry is not producing the desired result, please advise the customer to use the on-screen keyboard associated with the channel.
Hand Held Remote Mapping
¶ Troubleshooting
- Driver not reading Roku. Assign Static IP Address
- Auto Discover not working: On the Roku Device change Settings —> System —> Advanced System Settings —> Control by mobile Apps —> Permissive
- Icons not loading or slow loading. Turn off App Icons.
- If the discover and Install buttons are tapped again, the order and the IP address of the Roku Devices might be re-arranged. Make sure to verify the proper settings under Media Sources and under Zone Controllers
- If another Roku is added after the initial installation. Please use the RokuPro Communications Driver to Discover and Install. Do NOT install the Roku driver individually or use the use the ROKUTV SE driver separately. Please note Common Issue 4 above when rediscovering and reinstalling.
- If performing a driver update tap on Update in the configurator under communications device, also tap on update under one of the Roku drivers in the Media Sources. This will make sure all drivers are updated.
- Known issues with the keyboard button. Every Channel implements their keyboard key entry slightly different. For Example: Disney+ will allow the sending of upper case and lower case. However, it doesn’t respond to push and hold Clear. Vudu will allow the push and hold to Clear, however it will only send UPPER or lower case depending on the screen menu. In cases where the Keyboard entry is not producing the desired result, please advise the customer to use the on-screen keyboard associated with the channel
- HHR, HR10 and HR30 do not support channel or custom icons. Only Elan embedded icons are supported. HR40 has full icon support
- RokuTV is not being discovered. Make sure the TV is awake and on
- RokuTV is not being discovered while upgrading from version 1.x of the Roku Pro driver. Version 1.x of the Roku Pro treated the TV as a streamer. Delete the Media Source that is actually a TV. Discover and install.