¶ Integration Note
| Manufacturer | Tado |
| Model | Smart AC Control V3+, Smart Thermostat V3+, Smart Radiator Thermostat V3+ Wireless Temperature Sensor Wireless Receiver |
| Driver Name | TadoPro |
| Driver Version | 25.04.08.00 |
| Document / Driver Revision | Apr 08,2025 |
| Core Min / Max Tested | Min 8.8.xx |
¶ Overview
This is a two-way driver to control and get feedback from the Tado Cooling and Heating controllers.
The Elan controller is capable of controlling, querying and providing feedback for multiple Tado units.
Important Note: We have updated our drivers to follow Tado's new authorization method. Please follow the instructions to stay updated.
¶ Supported Features
The following options are supported:
- Auto Installation and Discovery of all Tado devices
- Driver will recognize the type of Tado unit (heating or A/C) and install the settings accordingly.
- Two-way control and feedback
- Get the state and triggers events for geofencing home and away.
- Triggers for battery life, Open Window and humidity Event maps
- Multi driver installation
- Get the capabilities of a zone
- Set the desired heating temperature in a zone in Celsius and Fahrenheit
- Switch on / off the heating in a zone
- Switch on / off the hot water boiler
- Create Schedule for hot water boiler
The following playback options are not supported :
Any feature not specifically noted as supported should be assumed to be unsupported.
¶ Device Configuration
- The Driver uses the Tado Cloud. An active internet connection must be present at all times.
- Install Tado and connect it to the cloud account and make sure it operates the Cooling or Heating unit directly from the app.
- If Elan is going to automatically manage the device, it is recommended to disable all automatic settings in the app as it will conflict with the configuration in Elan. Specifically disable Smart Schedule and Auto-Assist.
- If automatic settings are kept, the Elan controller will update the state. However, updates can take up to 30 seconds to sync.
¶ Driver Configuration
¶ Installation Process
IMPORTANT NOTE:
It is recommended that you follow the below installation process in order to ensure you are running the latest version of the [driver].
- Unzip and Extract all EDRVC Files from the downloaded file into the configurator Driver Installation folder.
- Open Climate, Communication Devices, Add New Communication Device
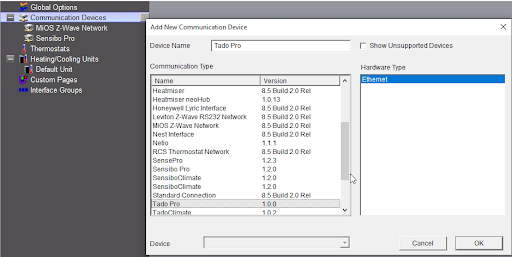
- Navigate to the folder where the driver is located and Choose the Tado Pro Driver. Note: There will be two Tado Drivers shown, TadoClimate and Tado Pro. Make sure to choose the Tado Pro for this step.
Note: If the driver doesn’t appear under the Communication Type then make sure that the Tado_Pro driver is extracted to the same folder where all the other drivers are installed from. It’s good practice to create one folder on the computer where all the third party EDRVC files live.
Note: If the driver still does not appear, do the following:
- Extract the downloaded zip file to you EDRVC folder (the folder where all custom EDRVC drivers live)
- Go to Thermostat, then add a Tado driver. Then Delete it.
- Now go back to Communications device, Add, Check the box the says show unsupported devices, the Driver should show up on the bottom.
- You’ll receive a warning that this is not a Native Elan driver, click OK
- The Driver will automatically go into trial mode for 30 days. Wait for about 10 seconds and the Status will turn Green.
- If you received an activation code enter it in the Activation KEY field as well. Hit Apply. Wait another 10 seconds and the driver will activate.
- NOTE: You Need To Authorize each Driver Separetly.
- Please watch the video to Follow the new Authorization Way. Video
- Hit Install. The driver will then Automatically Install
- Another communication driver called TadoClimate. If TadoClimate doesn’t install, see below note.
- All thermostats attached to the Tado account
Note: If the Thermostat is not installed, Under the TadoClimate Click “Install” - A default Heating/Cooling Unit.
- A Sense Input Driver to be used for Geofencing, Battery and Humidity Event Maps
Note: If a Tado Hot Water device is installed, the driver will install it as a lighting device under the Lighting Stub. This is the only way to be able to control the Hot Water via Elan Schedule.
Note: If the driver does not automatically install the TadoClimate driver, then manually install the TadoClimate Driver.
Follow Steps 1 – 6 above and choose TadoClimate in the Comm Driver Section.
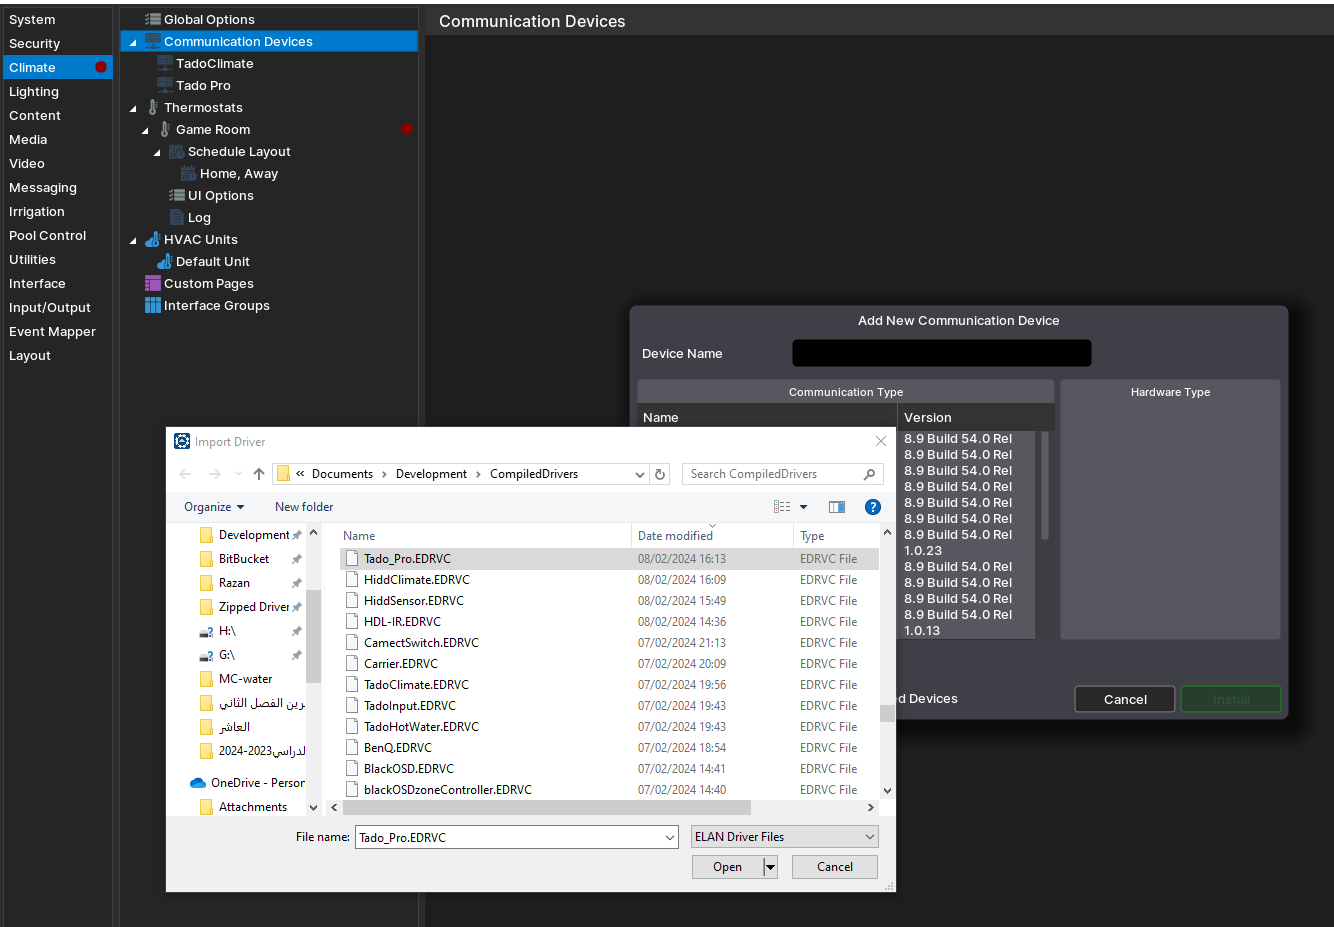
- After the installation is complete, the Comm, Climate and Thermostat drivers will be installed
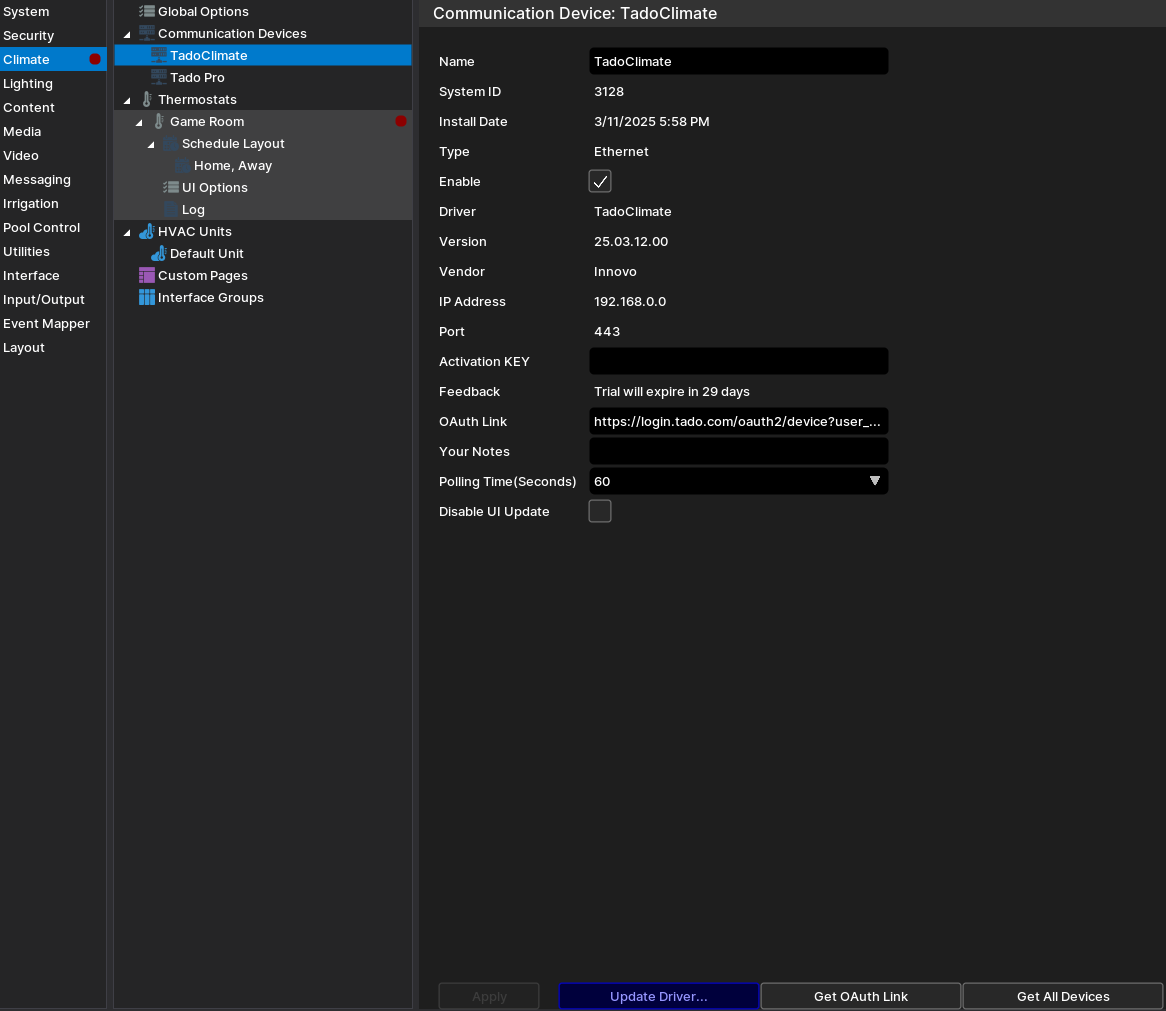
- After these drivers are installed change settings as needed to fit the Cooling or Heating Unit.
¶ Hot Water as a Lighting Device
NOTE: Make sure to turn off scheduling in the Climate stub for the hot water device. This will prevent the user from accidentally adding off schedules. Use only the Lighting Schedule.
The Tado Hot Water control is only on and off. You can still control it from the Climate Tab, however, the Climate Schedule will not work on the Hot Water. Because the Hot Water will be in the Off state sometimes, schedules will not run.
In order to use the scheduler in Elan, the driver will install any Hot Water device as a Lighting driver.
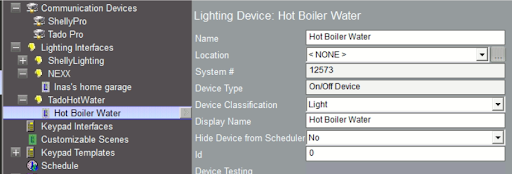
After Installation, you can create a custom Climate Page so that the user has a seamless experience and be able to control the Hot Water from the Climate tab.
To Do So,
Under Climate, go to Custom Pages, Add New Custom page, and create a page to control the unit. The page can have up to four elements.
- On / Off Lighting Button
- Humidity (you can include any humidity feedback variable)
- Temperature
- Last Reported (this is the last reported temperature and / or humidity value
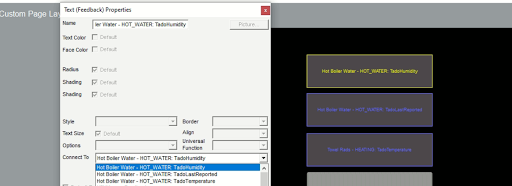
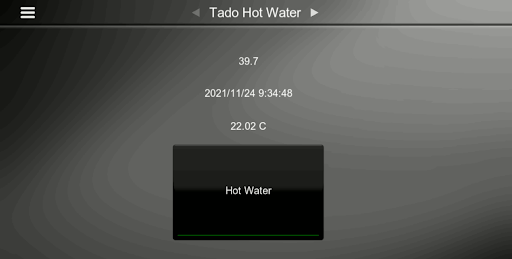
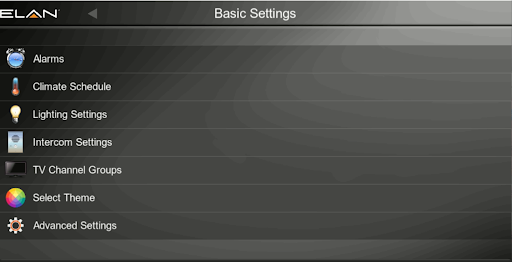
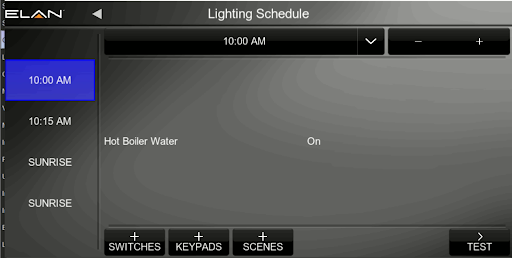
To Create a Hot Water Schedule, from the Viewer Go To Settings, Lighting Settings, Lighting Schedule and Add the device to the desired state and time.
¶ Event Maps
- The Driver will install a Sense Input driver for each Tado Device found in the account under the Input/Output Tab. This driver is designed for Event Map Triggers
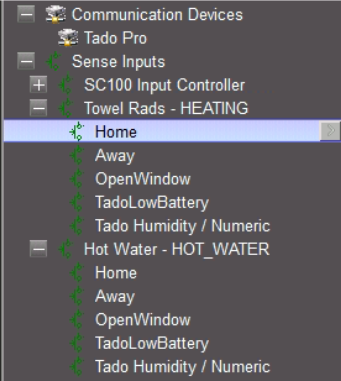
- Home is used to Track Geofencing Events
Note: This will only work if you’re NOT using “Auto-Assist” in Tado App.- Home Off 🡪On means user arrived Home
- Home On🡪Off means user is Away
- OpenWindow –
Note: This will only work if you’re NOT using “Auto-Assist” in Tado App.
i. Off🡪On means Open Window Event Happened
ii. OpenWindow On🡪Off means Open Window Event Stopped
c. TadoLowBattery Off🡪On means the battery is below Normal Level (replace battery)
d. TadoLowBattery On🡪Off means that battery is back to Normal (after replacing)
e. Tado Humidity / Numeric – This is a Numeric Only Trigger. See Below on how to create
¶ Numeric Trigger Events
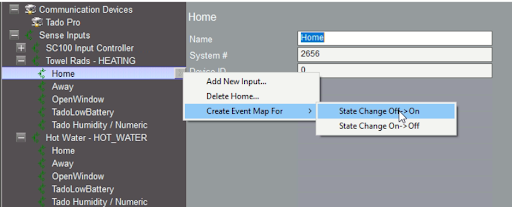
Example: To Create a Geofencing Event,
- Right click the Home under Sense Inputs Driver
- Choose Create Event Map For 🡪 State Change Off🡪On
- Geofencing will trigger every time the status changes.
NOTE: If there are multiple thermostats installed under the same account / driver, create a geofencing trigger under one thermostat only. All geofencing triggers (Home or Away)read from the same event. If the Geofencing is created under multiple thermostats, the same event will be triggered multiple times.
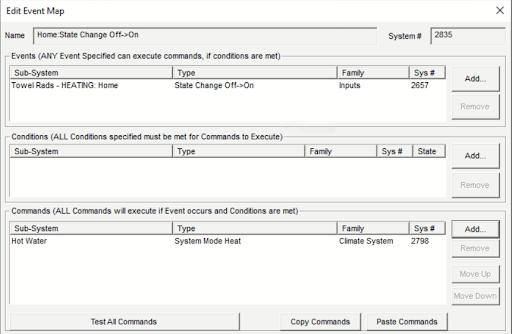
Example: Create an Event Map to Turn On the Hot Water when “Home” status changes from Off to On.
¶ Numeric Triggers
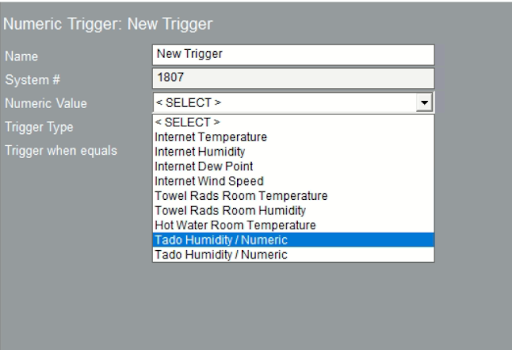
If you see the word Numeric next to a Sense Input, such as Tado Humidity / Numeric it means that those triggers can be setup using Elan Numeric Trigger Option under the Input / Output Tab. Do Not use Create Event 🡪State Change. This has no effect.
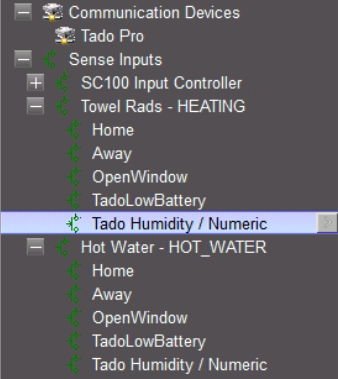
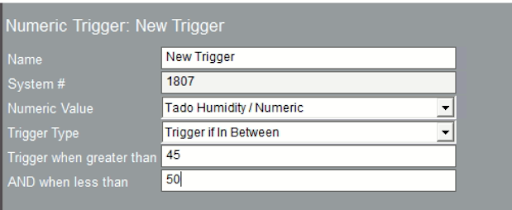
- To setup a numeric trigger, go to Input / Output 🡪 Numeric Triggers, Add New Numeric Trigger. Name it. Click Ok.

- Choose the Numeric Value Variable, Choose the Type and the trigger value.
- Note: Elan will show the name of the general name of the variable. If you have multiple drivers installed or multiple drivers with the same name such as Tado Humidity, you have no way to tell which sensors it belongs to by the name. The best way to determine which numeric trigger belongs to which driver is by their order of appearance and installation. The order of the variable appears in the list is the same as the order of the Tado specific sensors under Sense Inputs. For example, on the left, The Humidity variable for the Towel Rads is the first appearance of the word Tado Humidity / Numeric in the drop down list
- Use this numeric trigger in any Event Map
¶ Using the Driver
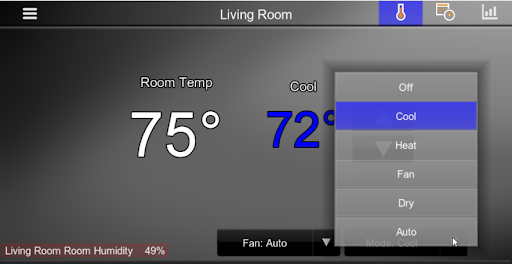
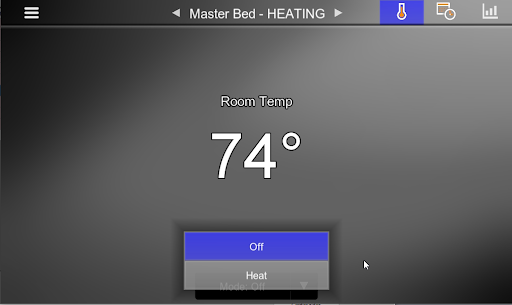
The driver uses the Native Elan Climate Interface. Turn the system on / off and schedule from the interface.
Notes: The system uses the cloud to communicate so there will be a notable delay from when a button is pushed to when the action is taken to the feedback sent back to Elan.
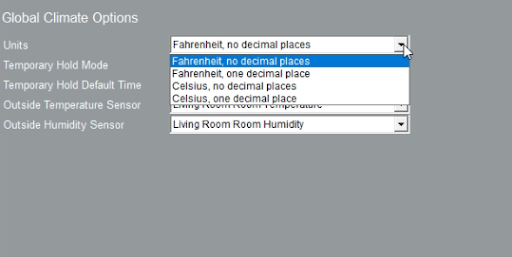
If the system is set for Fahrenheit, makes the same setting is applied in the Tado App when setting up devices.
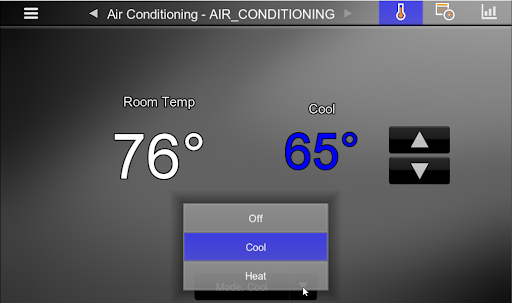
Control for AC Control V3
Control for Heating Only
¶ Troubleshooting
- There might delay of up to 30 seconds to sync the Tado App to the Elan Interface and vice versa.
- There is usually a delay of up to 10 seconds from when the command is issued in Elan to the Tado unit responding. This is due to the time it takes to process all commands using Tado’s cloud. This is not a delay from the driver.
- Hot Water schedule is not running. Make sure to turn of schedules under the climate tab for the hot water. Use the schedules for Hot Water under the associated lighting device.
¶ Update Release NOTES
| Update Level | Citical |
| Model | See Above |
| Driver Name | TadoPro |
| Driver Version | 25.03.12.00 |
| Document / Driver Revision | March 12, 2025 |
| Core Min / Max Tested | 8.6.11 / 8.7.505 |
To update the driver, replace the existing EDRVC file with the newly downloaded one.
- Start by clicking update on the driver under the tab, then the sub drivers, then each individual driver. Example, Start with the Communication Device Driver, Click Update, Go to the Lighting Driver, Click Update, Go to the Input / Output tab, click update under each type of device.
- Note: You only have to update one type of each driver, it will update the rest of the same type. For example, if you have three Input drivers installed, you only have to update one Input, the rest will be updated automatically.
- To Install new climate devices, go the Climate Driver and click Install
Bugs we fixed in 25.04.08.00
- Updated OAuth authorization flow for Tado integration.
Implemented support for Tado’s new OAuth method. Users must now retrieve an authorization link from the driver, complete the Tado authentication in a browser, and then fetch all devices.
Steps:
- Click Get OAuth Link in the driver. The link will appear in the OAuth Link Config String field.
- Open the link in a browser and complete the Tado login and authorization.
- Click Get All Devices to finalize the connection.
Bugs we fixed in 22.06.12.00
- Fixed driver crashing when Pro and Water Heater are installed.
- Fixed install TadoClimate
Features we added in 21.11.24.00
- Added Support for Water Heater as On / Off device under Lighting to take advantage of scheduling Feature
Bugs we fixed in 21.11.18.00
- Fixed Trial Activation Issue Medium
Features we added in 21.11.18.00
- Added Support for Water Heater as On / Off device Feature
- Changed Trigger for Humidity to be numeric. This adds more granular control. Feature
- Added Home / Away Triggers Feature
- Added LowBattery Triggers Feature